
Woodworking Network– Composite panels are made of small pieces of wood that are glued together. The basic idea of a composite material is that the properties of the composite are different (usually better) than the properties of the individual raw materials. There are at least 20 different wood composite products. Those used commonly within the furniture and cabinet industries include:
Plywood
Particleboard
Medium density fiberboard (MDF)
High density fiberboard (also called hardboard and Masonite)
Other composites include laminated veneer lumber (LVL), parallel-strand lumber (PSL), glue-laminated timbers and beams, multi-wood composites (such as Com-Ply), low density fiberboard (such as ceiling tiles), waterboard and flakeboard, oriented strand-board (OSB), laminated strand lumber (LSL), oriented strand lumber (OSL), cement board (such as HardiPlank).
Special concerns
In general, composite panel products require special handling when fastening two pieces together, or when joined to solid wood. Special fasteners and fastening systems have been designed to assist in this task.
Keeping a panel flat during manufacturing and in use requires special care, as even a little warp can be a defect. Many products have added wax to resist brief exposure to liquid water. This wax can interfere when gluing.
Smooth faces and edges of the panel are required for fine finishing. Some composites require special edge treatment, such as a laminate to cover the edge.
Because pressure is used when manufacturing most panels, there is a tendency for the panel, when first exposed to high humidity, to swell significantly in thickness (called springback) and for bumps to develop from anomalies in the wood materials used (telegraphing).
The adhesive can dull tools much faster than when machining solid wood. Historically, formaldehyde has been added to the adhesives to accelerate the chemical reaction that makes the glue joint strong. Concern about formaldehyde emissions after manufacturing have resulted in recent use of alternate adhesives or alternate formulations.
Table 1. General compassion of density, strength and stiffness of several composites to solid, clear wood.
– – – – – – – – – – – – – – – – – – – – – – – – – – – – – – – – – – – – – – – – – – – – – – – – – – – –
Material Density Elasticity Strength
Lb./cu. ft. million psi psi
– – – – – – – – – – – – – – – – – – – – – – – – – – – – – – – – – – – – – – – – – – – – – – – – – – – –
Red oak 40 1,8 14,300
E. white pine 22 1.2 8,600
Plywood 25-37 1.0-1.2 4,890-6,180
Particleboard 37-50 0.4-0.6 2.200-3,500
MDF 44-56 0.5 5,200
Hardboard 56-62 0.5- 0.8 4,500-8,200
– – – – – – – – – – – – – – – – – – – – – – – – – – – – – – – – – – – – – – – – – – – – – – – – – – – –
Plywood–product description
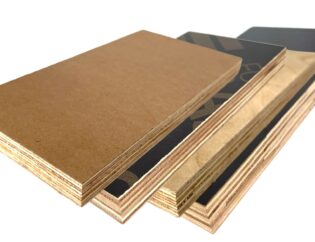
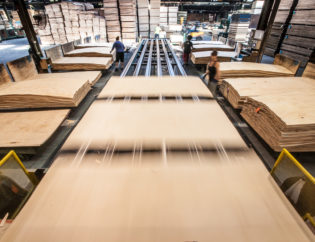
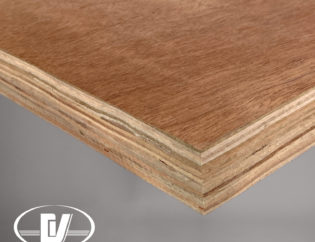
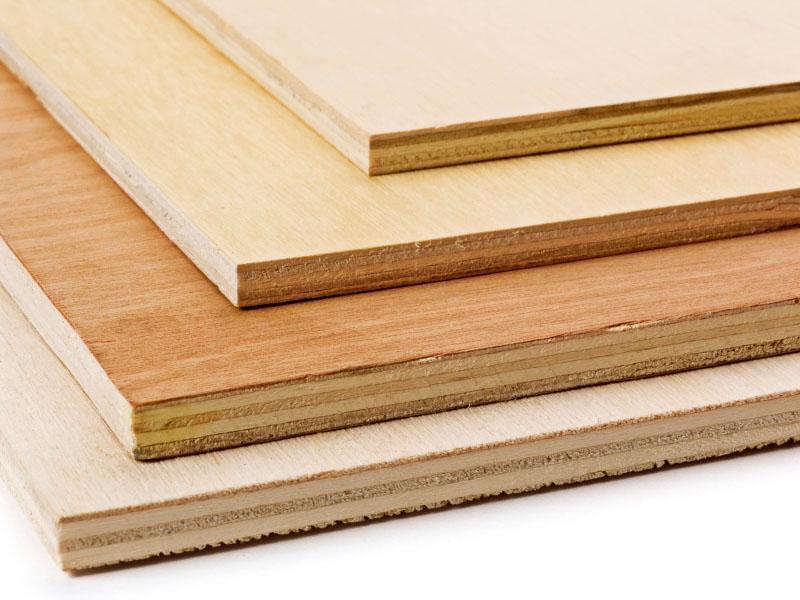
When wood is sliced or peeled into thin (1/32 to ½ inch thick, give or take) sheets, the resulting sheets are called veneer. The veneer is dried, cut to size (often 4 x 8 feet, but smaller pieces can be edge glued into larger sheets) and then spread with adhesive and laminated using heat and pressure into a plywood panel of desired thickness.
Although the inner veneer plies may have knots or other unsightly defects, the face and often the back veneer pieces are defect free.
Two types of adhesives are used: High water resistance with high heat resistance; and low water and heat resistance. The expected use governs which one. Traditionally, all adhesives had formaldehyde as a catalyst; “F” is being eliminated.
The surface veneer sheets are often quite rough, but can be sanded to achieve the desired smoothness.
The individual adjacent plies within a plywood sheet are almost always oriented at 90 degrees to the adjacent sheet. This means that the lengthwise or longitudinal grain, which is very moisture stable in wood, runs both the length and the width of the plywood panel in alternate layers. This orientation provides awesome stability in width and length shrinkage and swelling for plywood. Note that to keep things balanced, plywood almost always has an odd number of layers of veneer.
Because the wood quality (often knot free) for logs turned into veneer is high, because logs must be fairly large in diameter, and because a substantial amount of expensive adhesive is needed, plywood is an expensive product. Because of the low cost of logs and other financial factors in some foreign countries, exported plywood can be a lot less expensive. Some countries’ harvesting may not be accompanied by responsible forest care after harvesting, which also saves money.
Useful characteristics and processing hints
Overall, plywood has many advantages and only a few disadvantages.
Advantages
- Comes in many different thicknesses and sizes
- Different wood species available for cores and faces
- VAs string as solid wood
- Stainable and paintable faces after careful sanding
- Holds many conventional fasteners well
Disadvantages
- Expensive
- Often requires special edge finishing
- Sawing requires care to avoid splinters
A. Strength. Excellent stiffness often permits plywood panels to be used with no additional bracing by other materials. The properties of the wood species used, especially on the two faces, contribute greatly to the panel’s strength and stiffness. Also, the overall thickness of the panel is a major factor. In essence, a panel can be designed to provide the needed strength and stiffness properties. It should be obvious that poor glue lamination joints will make a poor strength panel and can lead to delamination.
B. Gluing. Due to the heat used in processing, gluing of plywood requires that the surface be scuffed a few minutes before gluing in order to expose (microscopically) fresh wood that is active for gluing. Even so, the heat in veneer drying and subsequent gluing may have permanently reduced the gluability; a well manufactured glue joint is at least 1.5 times stronger than the wood, so if we are careful when making a glue joint with plywood, we still can easily achieve a plywood joint that is stronger than the wood’s strength. But, as the safety margin is small, we do need to be very careful to be perfect in all the key gluing factors, especially choosing the best gap-filling adhesive and using the correct pressure.
Gluing small wood blocks at a 90 degree joint is a smart thing. Brad nails can be used to hold the blocks in place until the adhesive cures.
C. Fastening with Screws, Nails and Staples. Screws and large diameter nails into the faces will perform better if pilot holes are used. Otherwise, some delamination or splitting can occur lowering the fastener’s power. The heat in manufacturing makes the wood a bit more brittle. Also, oftentimes, the veneer will have small cracks (lathe checks from veneering) that are accentuated when screwing or nailing without a pilot hole.
Fasteners put into the edge without pilot holes tend to act as a wedge and can cause significant splitting and delamination, reducing the strength of the fastener and creating a surface bump.
Drill bit diameter for pilot holes can be 85 to 90 percent of the screw’s root diameter (the diameter inside the threads and not the outside diameter). The hole is a little deeper than the screw’s length.
D. Machining. Often when sawing a panel into smaller pieces, the sawn edge is chipped or splintery. This may be caused, in part, due to the brittleness created by heat in manufacturing. Using special saws designed for plywood cutting, sharp saws, and proper saw set-up, serrating or scoring the wood face veneer before sawing, and even taping the saw-line before sawing may help create a better edge. Low moisture hurts.
E. Warping. Well manufactured panels warp because the moisture changes and the overall shrinkage or swelling is uneven, likely due to wood characteristics including grain variations. Sometimes warp occurs because the top and bottom veneers are not the same in thickness, do not have the same finish thickness, and so on.
After initial manufacturing, plywood can be quite dry, such as 5 percent MC. Water-based finishes and a typical home or office can bring the plywood up to 6 to 8 percent MC (or higher in humid locations). If we coat the edges and both faces with several coats of a vapor resistant finish, we can slow the uptake and loss of moisture that occurs seasonally. (Poorly made plywood panels seem to warp no matter what finish is used; you get what you pay for!)
Buckle of veneer in plywood is a manufacturing error or related to grain variation in the wood.
F. Finishing. Microscopically, plywood veneers often have miniature cracks on one side, the loose-side. If the veneer is poorly made, these cracks can be larger. The larger cracks will open if wood is wetted and then dries. Because such cracks are almost always found only on one side, the other, tight-side, unchecked side is made to be the exposed face.
Another issue with some softwood plywood such as Southern pine is that the face veneer is a mixture of more open and permeable “earlywood” and dense, impermeable “latewood.” The latewood is much harder to finish successfully.
G. Grain Raising. When manufacturing any plywood, especially softwoods with high contrast between earlywood and latewood, pressure sometimes causes some of the cells (cells are miniature hollow tubes) to collapse. The surface can also be sanded smooth using too much pressure and create the same effect. When subsequently exposed to moisture (humid air or water in a finishing system, for example), the squished cells will rebound or springback to their original size, creating an uneven surface that mimics the grain in one or more plies of veneer. This is especially troublesome with glossy finishes. Exposure to humidity prior to final sanding should help, as well as reducing sanding pressure.

