How to Cut Plywood: A Complete Guide With or Without a Circular Saw
Cutting plywood can be challenging due to its large size and weight, making it difficult to handle and maneuver. This is especially true if you don't have access to a table saw. However, with the right tools and techniques, you can easily learn how to cut plywood by hand or how to cut plywood with…
Cutting plywood can be challenging due to its large size and weight, making it difficult to handle and maneuver. This is especially true if you don't have access to a table saw. However, with the right tools and techniques, you can easily learn how to cut plywood by hand or how to cut plywood with a circular saw, without a table saw. In this guide, VINAWOOD will show you how to cut plywood to achieve clean, precise cuts using a circular saw and other handy tools, ensuring your DIY projects are a success.
Things to know before cutting plywood
Before learning how to cut plywood, you need to know the difference between rip cut and cross cut, best blades for plywood cuts, tips to prevent tear out
Rip cut and cross cut
A rip cut runs parallel to the grain of the wood, meaning it follows the length of the plywood sheet. In contrast, a cross cut goes across the grain, cutting along the width of the sheet.
Cross cuts are much more prone to tear out compared to rip cuts, so it's important to be extra cautious when making these cuts.
Best blades for plywood cuts
The best way to avoid tearing out when cutting plywood is to use a high-quality plywood blade, regardless of the type of saw you're using. Ensure that your saw blade is labeled "plywood," "finish," or "fine finish." These blades have a high tooth count, which allows them to cut the wood much more cleanly, reducing the risk of tearing. For example, a 60-tooth blade is ideal for cutting plywood with a circular saw.
Tips to prevent tear out
When using a circular saw, the blade's rotation causes the teeth to cut upwards, making the top side of the plywood more susceptible to tear out than the bottom side.
To minimize this, flip your plywood sheet so that the "good" side (the side you want to be visible) is facing down. This way, any tear out that occurs will be on the "bad" side.
For instance, if you're constructing a dresser, you can position the "bad" side facing inward, hiding any tear out in the finished piece.
Another effective method to prevent tear out is to apply painter's tape along the cut line before you start cutting. The tape helps hold the wood fibers in place as the saw blade passes through, reducing the risk of tearing.
> Read more: 1/8 inch plywood, 15/32 plywood, 19/32 plywood, 5x10 plywood
Tools needed for cutting plywood
Here are the tools needed when cutting plywood and how they work. Below are three commonly used tools for cutting plywood:
- Circular Saw
- Kreg Rip Cut
- Kreg AccuCut
The Rip Cut and AccuCut are handy guides that attach to the base plate of your circular saw. Although they aren't absolutely necessary, they are incredibly useful for making quick and accurate cuts.
Alternatively, you can use a long straight edge and some clamps, but this method requires significantly more setup time for each cut.
Rip Cut and AccuCut guides
Both the Rip Cut and AccuCut guides come with a universal sled that attaches to your saw’s base plate using set screws. Once attached, this sled can be used with either guide.
The sled slides onto the Rip Cut rail and clamps in place. You then guide the straight edge along the plywood to make cuts up to 24" wide. The Rip Cut is perfect for ripping plywood into smaller strips but is limited to 24" wide cuts. This is where the AccuCut shines. The AccuCut acts like a track saw, with 2' track sections that can be extended up to 8'. This allows you to make longer cross cuts across the plywood.
You can use the Rip Cut for ripping and the AccuCut for cross cutting. If possible, you should have both for versatility.
> Get more details: pine plywood, ac plywood, bamboo plywood, bendable plywood,poplar plywood
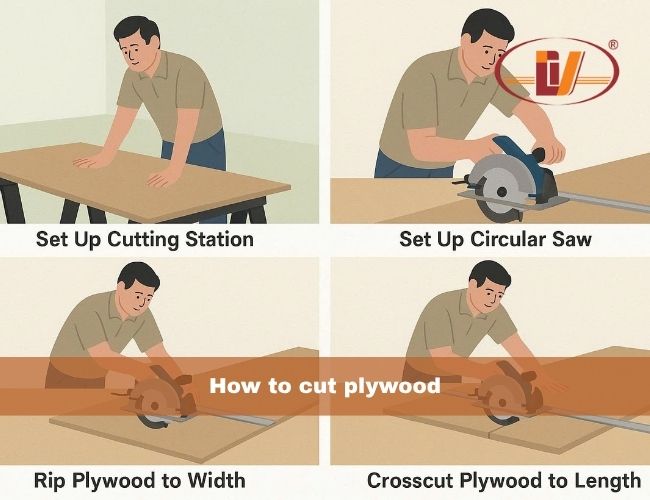
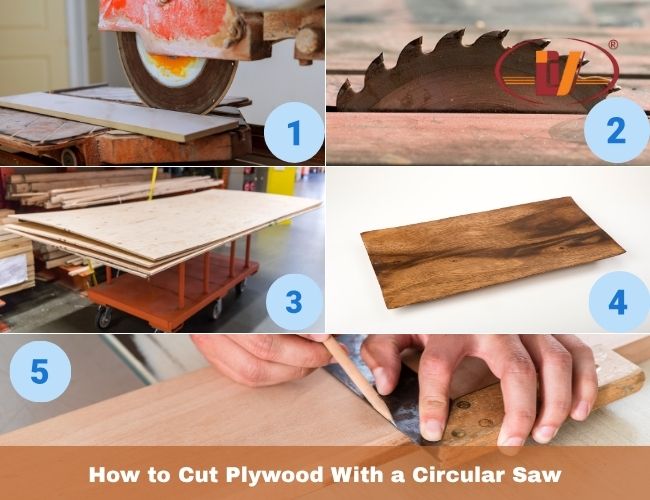
Step-by-Step: How to Cut Plywood With a Circular Saw
A circular saw, also known as a skill saw, is frequently used to cut plywood. However, making long, straight cuts can be challenging without a jig or guide. To solve this, you can clamp a board along the length of the plywood to serve as a guide for your saw, ensuring straighter cuts. Below are detailed instructions on how to cut plywood with a circular saw. It also includes some tips to help you do better.
Step 1: Select the Proper Blade for Smooth, Tear-Free Cuts
Before making any cuts, it’s essential to choose a blade specifically designed for plywood. A carbide-tipped blade with a high tooth count will give you the cleanest results.
Look for blades labeled "plywood," "fine finish," or "finish cuts." These typically have 60 to 80 teeth, which helps reduce splintering along the edges.
Check the size and arbor of the blade to ensure it fits your circular saw model. Using a generic or factory-included blade often results in rough cuts and tear-out, especially on the top veneer.
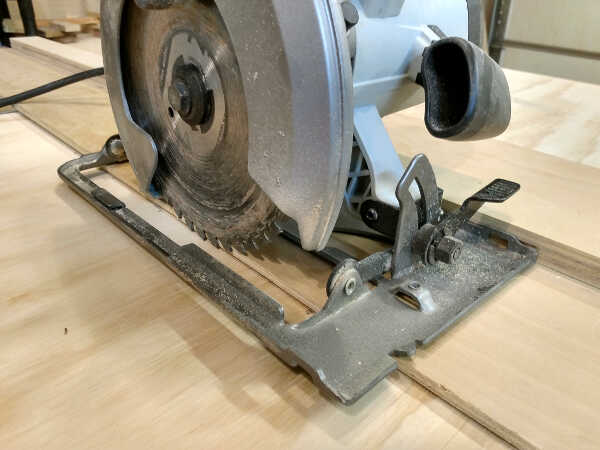
Step 2: Adjust the Blade Depth Correctly
Before you begin cutting, take a moment to set your circular saw blade to the correct depth. A blade that’s too deep will force more metal through the wood than necessary, increasing resistance and risking kickback. On the other hand, a blade that’s too shallow may not cut through the entire thickness of the plywood, especially near the edges.
The ideal setup is to have the blade extend about 1/4 inch (0.6 cm) below the bottom of the plywood.
For example, if you're cutting a 3/4 inch (1.9 cm) sheet of plywood, set your blade depth to 1 inch (2.5 cm).
Tips:
- Use a fine finish/plywood blade on your circular saw when cutting plywood.
- Dedicate a circular saw for plywood cutting if you do a lot of it. This saves setup time and ensures more accurate cuts.
- If you don't have a dedicated plywood saw, make sure to remove the sled before using the saw for other purposes.
Step 3: Support the Entire Plywood Sheet During the Cut
To ensure a clean, safe cut, you must support the entire sheet of plywood — especially on both sides of the cut line. Without proper support, the plywood can bend, splinter, or even snap as you reach the end of your cut.
A reliable setup includes placing a few long 2x4s across two sawhorses to create a stable surface. Keep these 2x4s reserved just for cutting — your saw blade will likely nick them during the process.
If you don’t have sawhorses or lumber available, a great alternative is to use a sheet of rigid foam insulation. Simply lay the foam on the ground and place the plywood on top. This setup supports the entire sheet and allows the saw blade to pass through safely without damaging the ground.
Tips:
- Clamp the plywood securely to your work surface to prevent it from moving during the cut.
- Use a fine-tooth blade designed for plywood to minimize tear-out.
- Wear safety glasses and gloves when operating power tools.
Step 4: Position the Good Side Facing Down
When using a circular saw to cut plywood, always place the "good" side of the sheet facing down — this is the side you want to remain clean and visible in your finished project.
Why? Because the saw blade enters from the bottom and exits through the top. As the teeth exit the surface, they can cause splintering or chipping. By flipping the plywood so the good face is underneath, any tear-out will occur on the back side, where it won’t be seen.
Miter saw (if plywood strips are smaller than 16″ wide):
-
Use a fine-tooth blade to minimize tear-out.
-
Set the miter saw to 90 degrees for a straight cut.
-
Measure and mark the desired cutting length on the plywood strip.
-
Align the plywood strip with the miter saw fence and secure it in place.
-
Slowly lower the blade and make the cut.
Accu-Cut (if plywood strips are wider than 16″ wide):
-
Use a square to mark the desired cutting length on both sides of the plywood strip.
-
Ensure proper support for the plywood strip to prevent sagging and blade pinching.
-
Align the cutting edge of the Accu-Cut guide with the marks.
-
Place the Accu-Cut guide on the "good" side of the mark, ensuring the blade cuts on the "waste" side.
-
Run the circular saw and sled down the Accu-Cut guide to make the cut.
-
Wipe off dust and debris from the grips and plywood surface if the guide slips.
Tips:
- Wear safety glasses and gloves when operating power tools.
- Use a sharp blade for clean, accurate cuts.
- Support the plywood strip adequately to prevent accidents.
- Double-check measurements before cutting.
> Discover more: burnt plywood floor, plywood edge banding, plywood garage walls, plywood kitchen cabinets
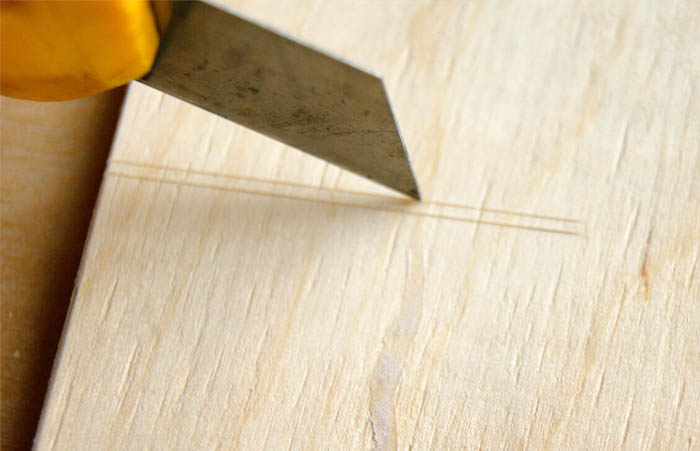
Step 5: Mark Your Cutting Line Precisely
Accurate measuring is key to a clean, professional-looking cut. Use a straight edge or a framing square to mark your cutting line clearly across the plywood sheet. Always ensure your line is square to the edge if you're making right-angle cuts.
For even cleaner results, score along the cutting line with a utility knife before sawing. Run the knife over the line a few times to lightly cut through the surface veneer—this helps reduce tear-out when the saw blade exits the material.
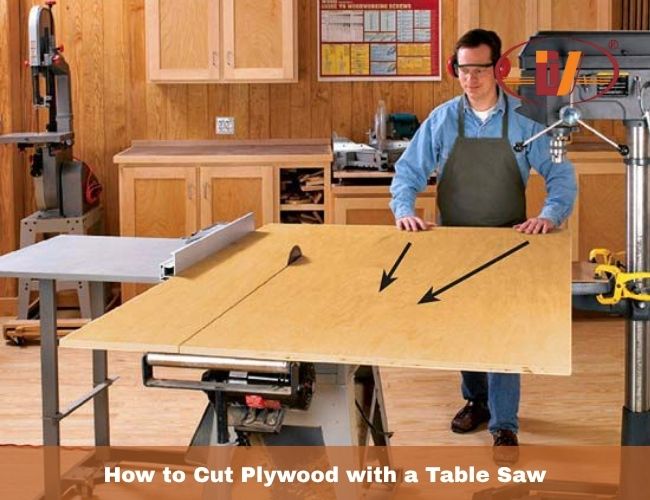
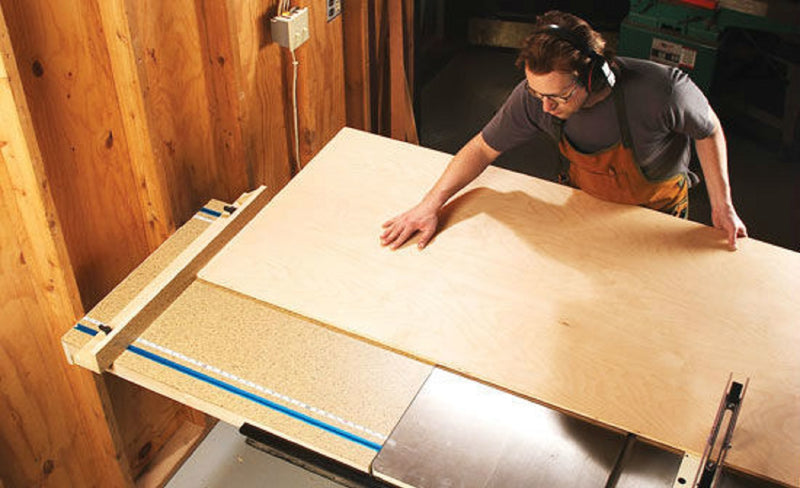
How to Cut Plywood with a Table Saw
A table saw is one of the most efficient tools for cutting plywood, especially when you need precise, repeatable straight cuts. However, it does require proper setup to avoid tear-out and ensure safety.
Step 1: Choose the Right Blade
For clean cuts, use a high tooth count blade, such as an 80 TPI (teeth per inch) plywood blade. These blades are designed to reduce splintering and deliver a smooth finish on both sides of the plywood.
Stock blades that come with table saws are typically rough-cutting blades and will likely cause tear-out on plywood edges.
Optional but recommended: Use a zero-clearance insert to minimize bottom-side splintering. This insert fills the gap between the blade and the throat plate, offering better support for the wood fibers.
Step 2: Raise the Blade to the Right Height
Adjust your blade height so the teeth are just above the surface of the plywood, ideally no more than 1 inch (2.5 cm) above the sheet.
- Lower blade height → more angled entry, potentially rougher cut.
- Slightly higher blade height → cleaner, perpendicular entry and exit.
Caution: A raised blade offers a smoother cut but increases the risk of injury. Always cut with extreme care.
Step 3: Use a Zero-Clearance Insert
A zero-clearance throat plate prevents splinters on the bottom side of the cut by eliminating the space where wood fibers can break away.
You can:
- Buy one online or from a hardware store.
- Make your own by raising the blade through a spare piece of wood clamped tightly in place.
This "sacrificial insert" should be used only when cutting multiple sheets, as it wears down over time.
Step 4: Support the Entire Sheet
Plywood is large and heavy, and if it's not properly supported, it can bend, bind, or snap during a cut.
- Use sawhorses, an outfeed table, or ask a second person to help stabilize the sheet.
- Keeping the sheet flat and level allows for consistent feed rate, reducing binding and improving accuracy.
- Alternatively, use a circular saw to break large sheets into smaller panels before using the table saw.
Step 5: Tape Along the Cut Line
To minimize chipping:
- Apply low-tack painter’s tape on both sides of your cutting line.
- Press it down firmly and mark your cut line on top of the tape.
- Peel off the tape slowly after the cut to avoid lifting splinters.
Step 6: Cut with the Good Side Facing Up
On a table saw, the blade enters from the top and exits through the bottom. Therefore, always lay the plywood with the good face facing up.
This ensures that any tear-out or chipping will happen on the underside — hidden in your finished project.
Step 7: Make the Cut Safely and Accurately
- Position the plywood firmly against the rip fence (the straight guide running parallel to the blade).
- Use both hands:
- One hand (closer to the blade) should guide the sheet forward.
- The other hand (further from the blade) should keep the sheet tight against the fence.
- As you near the end of the cut, reposition your hands to keep control on both sides of the blade.
- Push gently and steadily, avoiding any sudden force or jerks.
Safety Tips:
- Always wear safety glasses.
- Never place your hands in the path of the blade.
- Keep fingers at least 6 inches (15 cm) away from the blade.
- Keep your workspace clean and the offcut area clear of obstacles.
Making a Plunge Cut in Plywood
A plunge cut is a useful technique when you need to start cutting from the center of a plywood sheet rather than from the edge. It’s commonly used to create internal cutouts, such as for sinks, vents, or electrical boxes. This method requires careful setup and safety awareness.
Step 1: Ensure the sheet is stable
Place your plywood sheet across a few 2x4s supported by two sawhorses. Make sure the entire sheet is flat and steady. Plunge cuts demand maximum stability, as the saw enters the material without the support of an edge.
Step 2: Set the blade depth
Adjust your circular saw’s blade so it extends about 0.25 inches (0.6 cm) beyond the bottom of the plywood. This provides just enough depth to cleanly exit the material without excessive blade exposure, which can lead to splintering or dangerous kickback.
Step 3: Stand to the side of the saw
Do not stand directly behind the saw while performing a plunge cut. Always position yourself slightly to the side to avoid the risk of kickback — when the saw jerks backward unexpectedly due to resistance in the material.
Step 4: Position the saw for a plunge cut
Place the front edge of the saw’s shoe (base plate) on the plywood at the cut location. Manually lift the blade guard and align the blade exactly over your marked cut line, ensuring control and precision.
Step 5: Check below the cutting area
Because you’re cutting from above and can’t see underneath, check in advance to ensure nothing is beneath the plywood. This helps prevent damage to your surface or tools and keeps your work area safe.
Step 6: Lower the blade and complete the cut
Turn on the saw and slowly lower the spinning blade into the plywood while maintaining a firm, steady grip. Once the blade is fully embedded and the base plate lies flat, release the blade guard and push the saw forward to continue the cut.

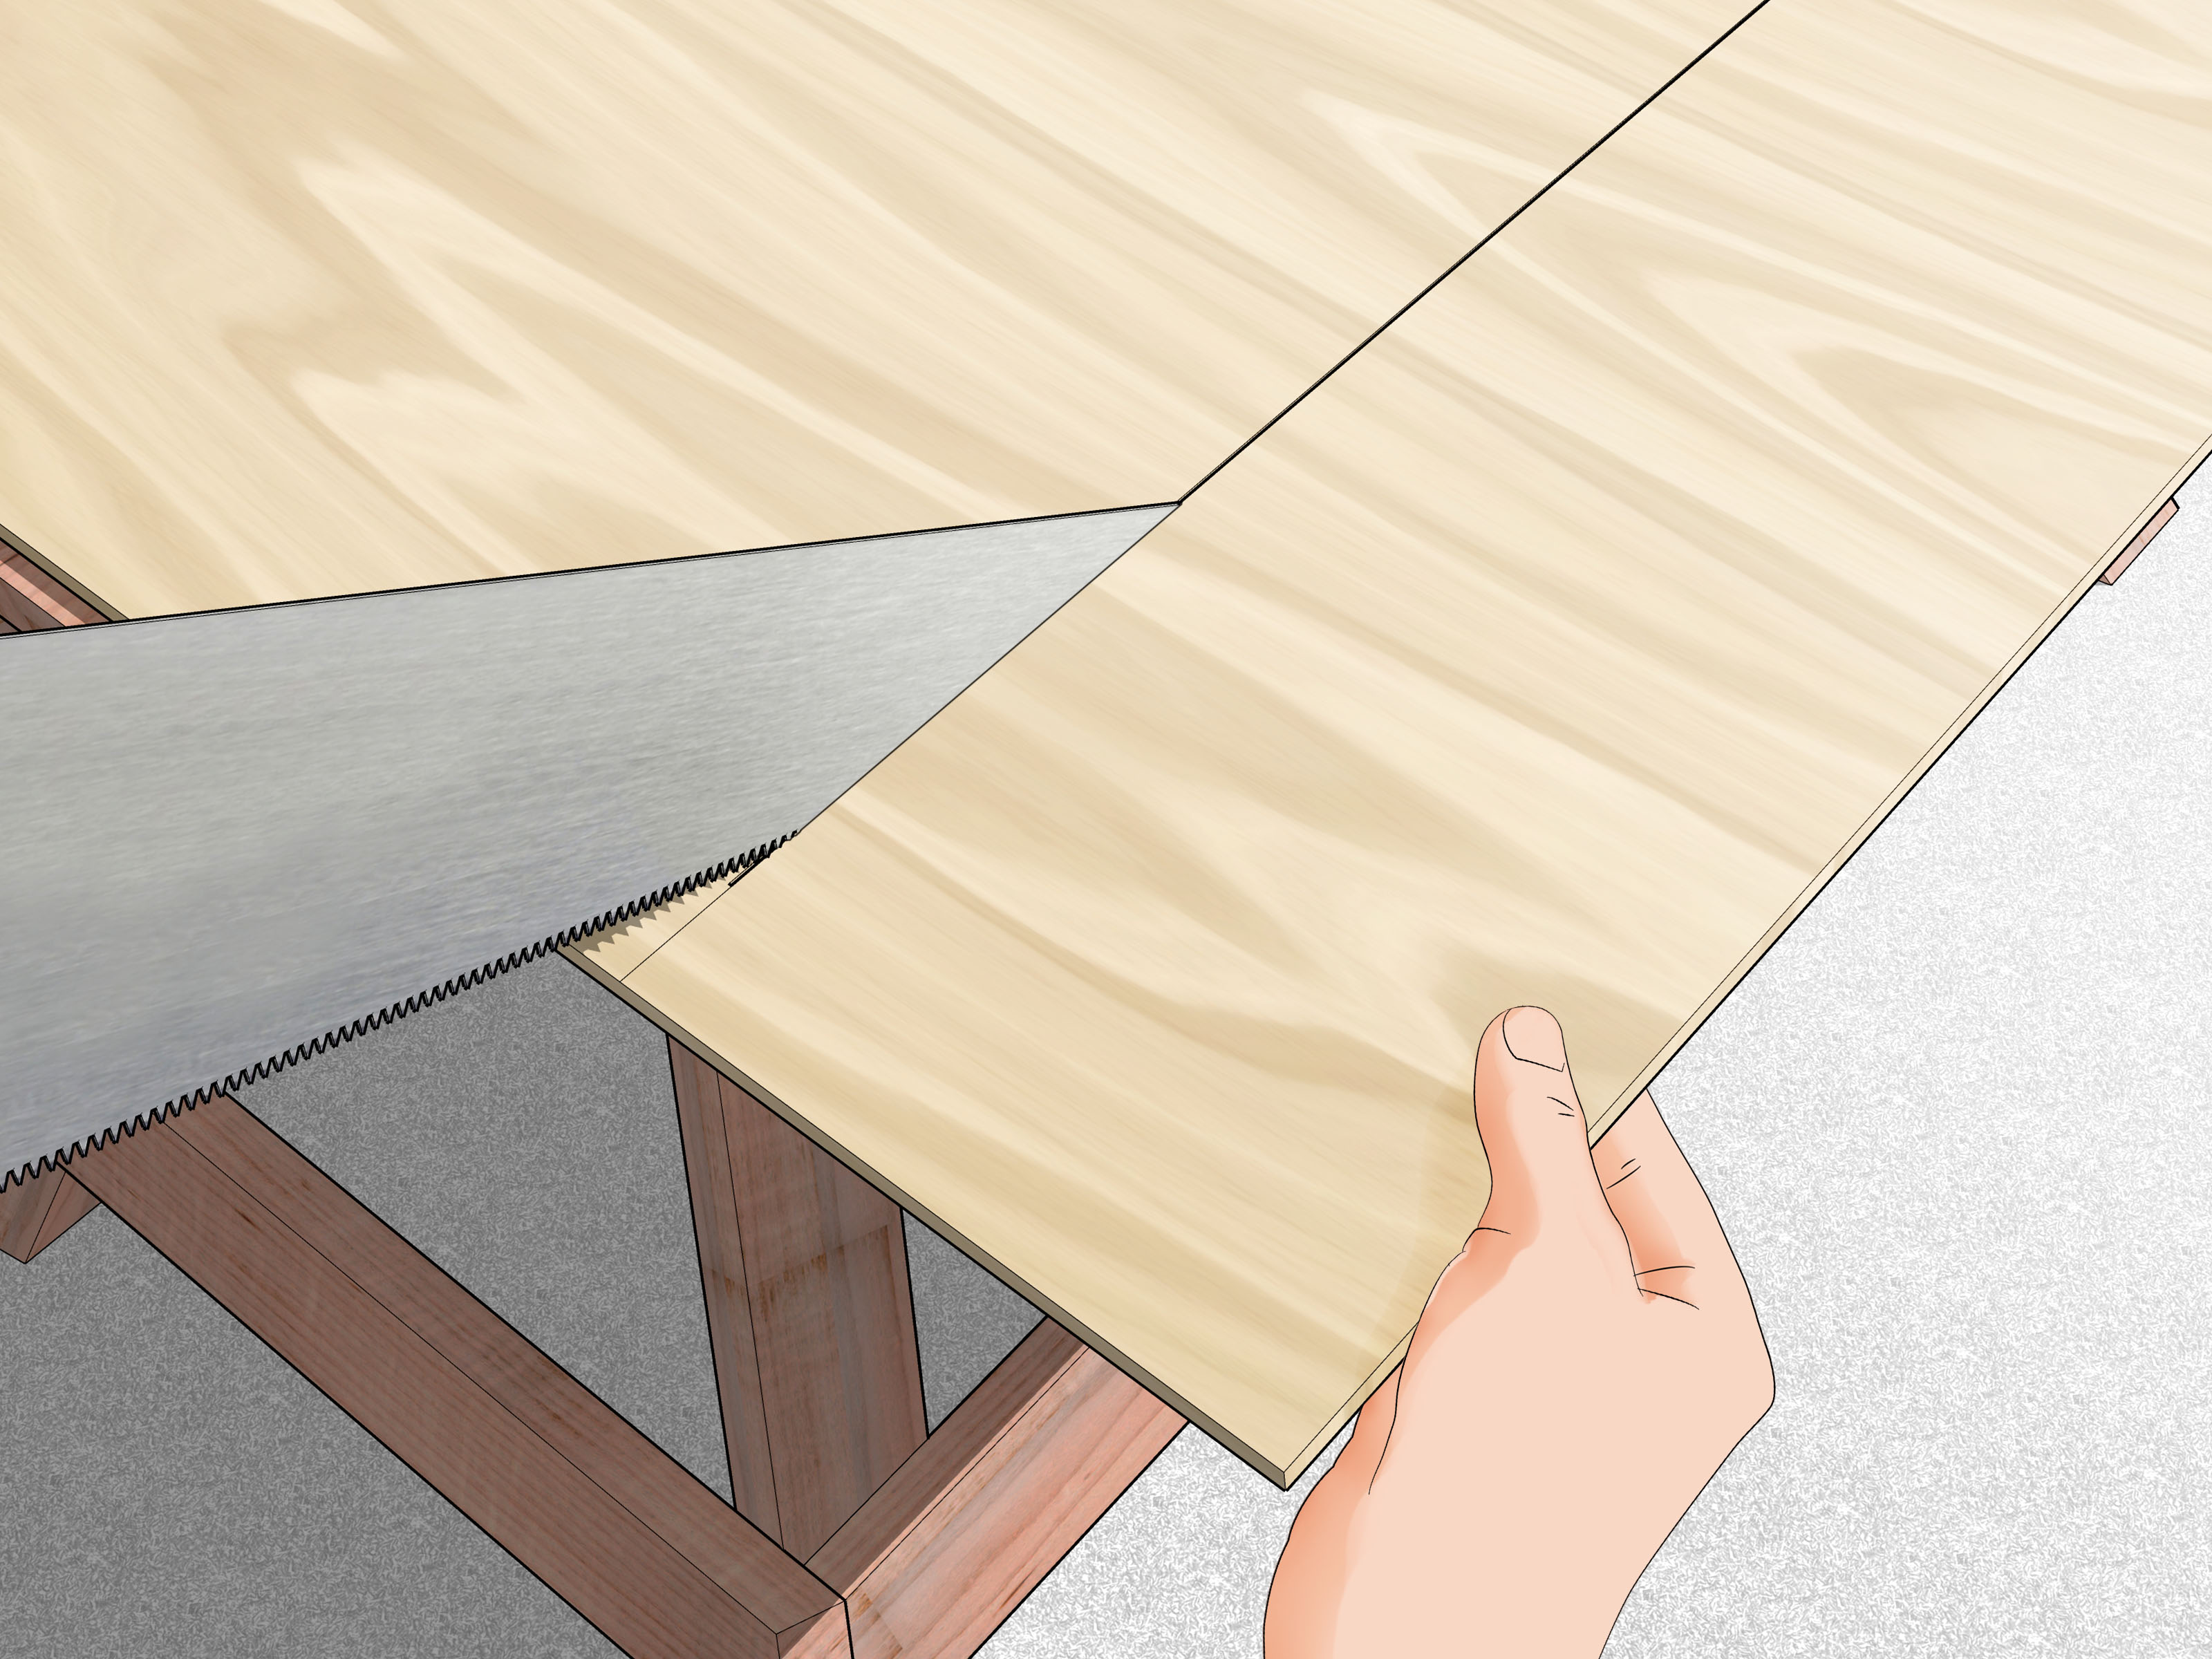
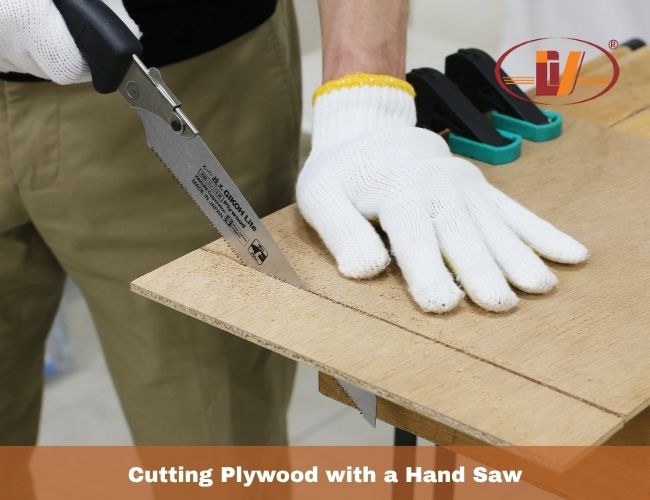
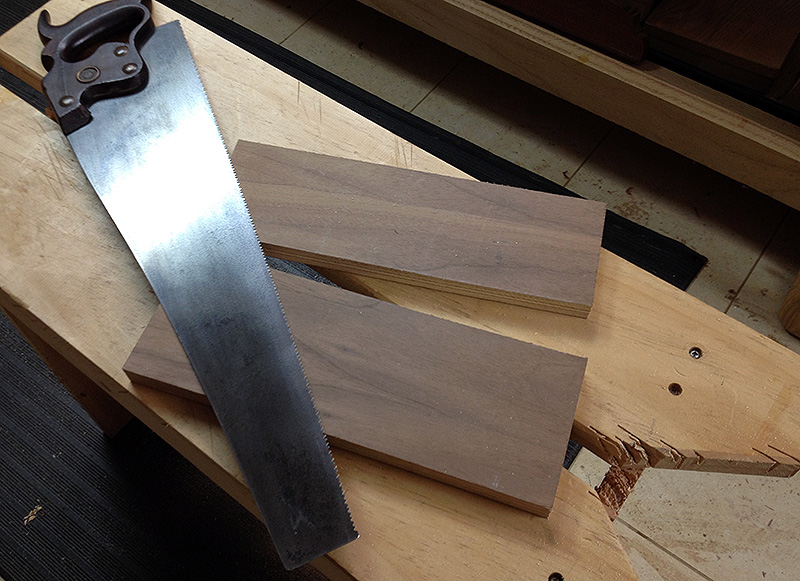
Cutting Plywood with a Hand Saw
If you don't have access to power tools, a handsaw is a dependable option for cutting plywood. While it requires more time and effort, with the right technique, you can still achieve clean and precise cuts.
Step 1: Choose a quality handsaw
Invest in a solid crosscut saw with the right TPI (teeth per inch) for your needs.
- A lower TPI (e.g., 7–10) cuts faster but leaves a rougher edge.
- A higher TPI (e.g., 12–15) cuts slower but results in a smoother finish.
Check that the handle feels comfortable and the saw blade is straight. The blade tip should be flexible but return to center when bent — a sign of good steel and balance.
Step 2: Measure your cut accurately
As with any woodworking project, precise measuring is key.
Use a straightedge or ruler and double-check your dimensions before cutting. Once the plywood is cut, there's no easy way to reverse mistakes — so follow the rule: measure twice, cut once.
Step 3: Notch the plywood edge
Begin by holding the saw blade vertically and using short upward strokes to create a notch on the plywood edge. This notch helps the blade seat firmly and prevents it from slipping when you start the full cut.
You can use your thumb knuckle as a guide, but proceed cautiously to avoid injury.
Step 4: Start the main cut
Once the notch is established, lower the blade to a 30–45 degree angle and begin cutting with smooth, full strokes.
- Keep your shoulder, arm, and hand aligned with the saw blade to stay on track.
- If the saw begins drifting off the line, gently twist the handle to correct the path without forcing it.
Step 5: Brace the cut-off section to prevent splinters
As you near the end of the cut, use your free hand to support the off-cut piece.
Switch to short, vertical strokes with the saw to finish cleanly and avoid tearing or splintering the final edge.
Some other ways to cut plywood
Here are some other methods for cutting plywood that you can consider.
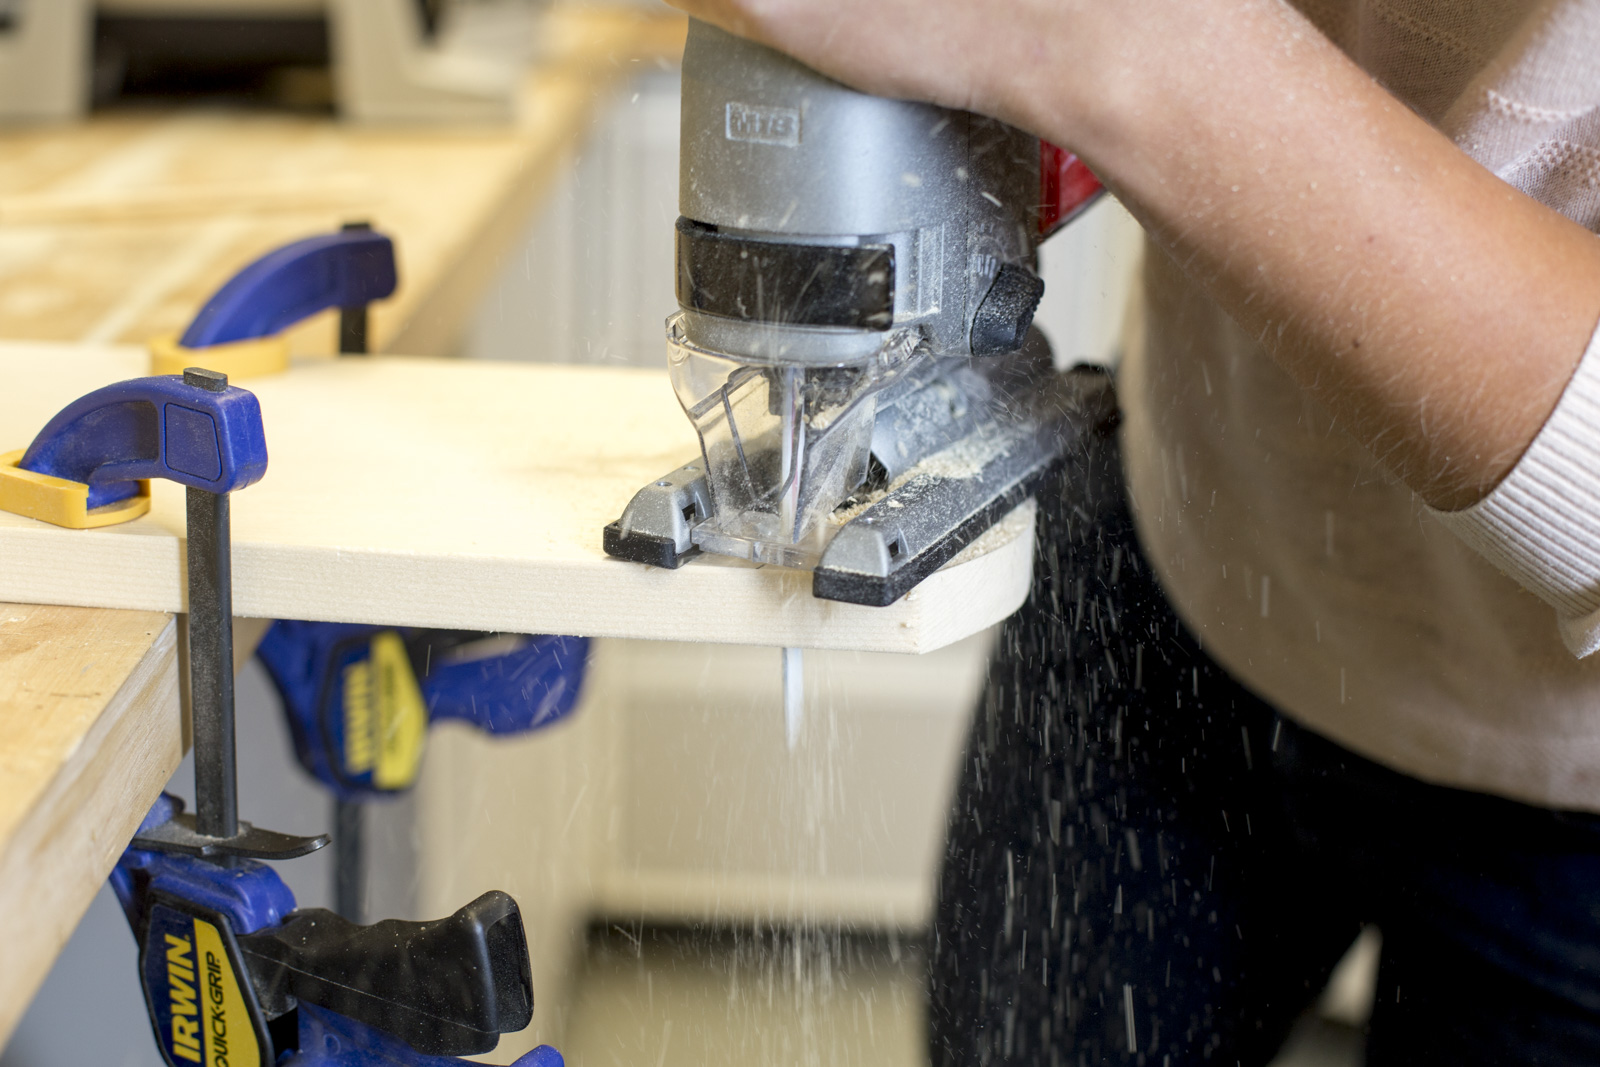
How to cut plywood with jigsaw
For cutting plywood into circles or intricate patterns, a jigsaw is ideal. While it can make straight cuts, it's more challenging. Ensure the jigsaw's cord is long enough to reach your cutting area. Use a 20 teeth per inch blade with in-line teeth and lock the angle or depth adjustment knobs before starting.
> Learn more:
How to cut plywood with a knife
To cut plywood with a knife, use a sharp blade to avoid splintering. Guide your cuts with a straight edge or metal ruler. Cut slowly and steadily, letting the blade do the work. Make several passes rather than cutting through in one go.
How to cut plywood with a Handsaw
Cutting plywood with a handsaw isn't the fastest or most precise method, but it's effective for a few cuts. Start with a sharp blade, preferably a miter handsaw for smaller cuts. For longer, straight cuts, use a stiff board as a guide and clamp it along your cut line. Cut only on the push motion to maintain control. For larger saws, use the stiffer part of the blade near the handle to prevent bending.
How to cut plywood with a table saw
Handling a 4' x 8' sheet of plywood on a table saw can be risky, so always get help. For a clean cut and less chip-out, set the blade height to its maximum and place the good side face-up. Maintain steady pressure on the fence while feeding the plywood, and have someone catch it at the other end without applying pressure to ensure a straight cut.
FAQ regarding how to cut plywood
What is the best tool to cut plywood?
The best tool for cutting plywood is a circular saw. It's portable, user-friendly, and makes straight cuts quickly and accurately.
How to cut a sheet of plywood by yourself?
To cut plywood by yourself, use sawhorses for support, clamp a straight edge as a guide, and score the cut line with a utility knife. Use a fine-tooth blade on a circular saw, cutting only on the push motion for precision.
What is the best way to cut plywood straight?
To cut plywood straight, use a stiff board as a guide. Clamp it along your cut line to act as a jig. For the best results, cut only on the push motion of the saw, not the pull. This technique helps you slow down and make more precise cuts.
How to cut plywood without splintering?
To prevent splinters, use a ruler and a Stanley knife to score along the cut line before sawing. Additionally, apply painter's tape to both sides of the sheet and mark the cutting line on the tape. This method works well with various saws.
The above article has instructions on how to cut plywood. Cutting plywood doesn't have to be intimidating. With the right tools and techniques, you can achieve clean, precise cuts every time. Remember to choose the right blade, use guides to help with straight cuts, and take your time to prevent tear out.VINAWOOD – Vietnam Plywood Supplier & Manufacturer