What Is Plywood Edge Banding? How To Cover Plywood Edges
Plywood offers a versatile and cost-effective material for building furniture and cabinets. However, exposed plywood edges can sometimes disrupt the desired final aesthetic. For those seeking a more finished look that resembles solid wood, plywood edge banding provides a simple and economical…
Plywood offers a versatile and cost-effective material for building furniture and cabinets. However, exposed plywood edges can sometimes disrupt the desired final aesthetic. For those seeking a more finished look that resembles solid wood, plywood edge banding provides a simple and economical solution. What is plywood edge banding? This guide will delve into how to utilize iron-on edge banding to transform your plywood projects, achieving a clean and professional finish.
> Read more: plywood sizes, 3/4 plywood, 4×8 plywood, 1/2 plywood, 5/8 plywood, 1/4 plywood
What is plywood edge banding?
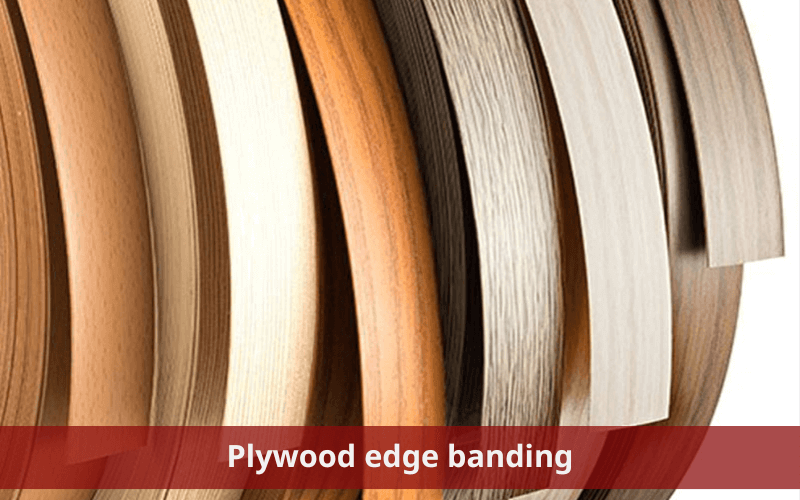
Plywood edge banding is a narrow strip of veneer (often wood or PVC) used to cover the exposed edges of plywood panels. Its purpose is to make the panel look like solid wood while preventing damage from moisture, chipping, or wear.
Edge banding comes in various materials, widths, and finishes to match different plywood types like birch plywood, white oak plywood, or bamboo plywood. The most common DIY option is iron-on edge banding, which uses pre-applied heat-activated adhesive for easy application.
Common components of edge banding:
- Outer surface: Smooth, colored or wood-grain finish.
- Back layer: Glue layer that bonds to the plywood edge with heat.
> Read more: 1/8 inch plywood, 15/32 plywood, 19/32 plywood, 5x10 plywood
What is the purpose of plywood edge banding?
Plywood edge banding serves two essential purposes in both functional and aesthetic aspects of woodworking:
Durability and Structural Integrity
Edge banding acts as a protective layer for the vulnerable sides of plywood. These edges, if left bare, are more likely to:
- Chip under impact
- Absorb moisture
- Delaminate or warp over time
Applying edge banding helps maintain the plywood’s structural strength. This added reinforcement is especially useful in high-contact furniture pieces, such as shelving units, kitchen cabinets, and work surfaces. Even in low-wear locations like cabinet interiors, where friction from stored items and shelf adjustments is frequent, edge banding helps reduce long-term wear.
Aesthetic and Visual Cohesion
Plywood layers (or plys) are typically visible along the edge, giving an unfinished look. Edge banding conceals these layers, offering a smooth and continuous appearance that mimics solid wood. This is essential for projects where visible details matter, such as:
- Open-shelf bookcases
- Tabletops
- Exposed cabinet sides
Using a color- and grain-matched edge banding ensures consistency across the piece, removes the “DIY look,” and brings a refined, professional touch to your woodworking project.
> Get more details: pine plywood, ac plywood, bendable plywood,poplar plywood
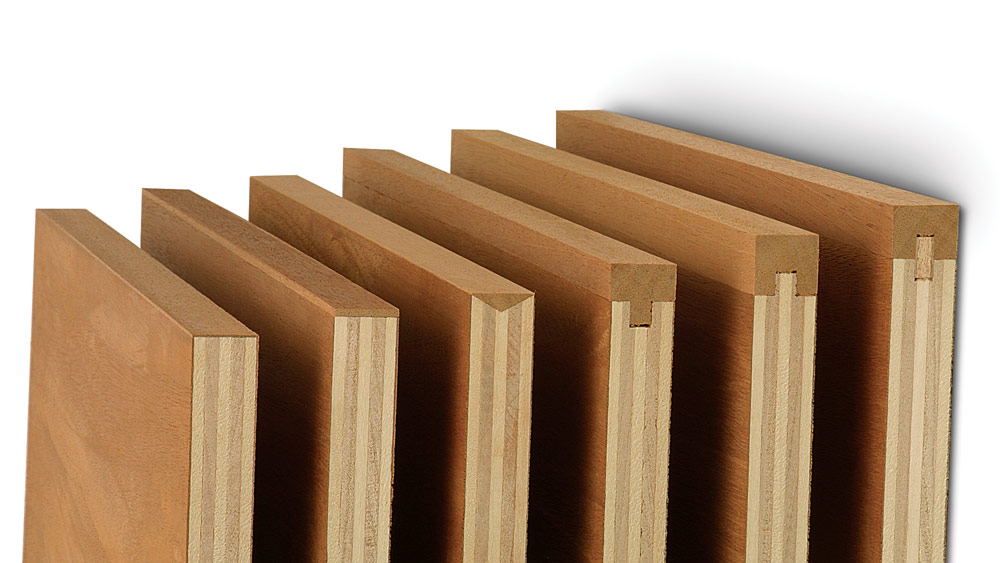
Application and non-application of plywood edge banding
By covering the exposed edges of plywood, edge banding helps to prevent damage from moisture and wear, while also giving the furniture a more refined and finished appearance. Knowing where edge banding is typically applied and where it is not can provide valuable insights into the construction and longevity of furniture pieces.
Where plywood edge banding is used?
You'd typically find plywood edges banding all exposed edges of plywood furniture including shelves, cabinet sides, tabletops and any other exposed plywood surfaces.
Unexpected places for functionality: Like on plywood bed decks, where a fully sealed surface with edge banding helps prevent bed bugs (as mentioned in the original text).
Where plywood edge banding isn't used?
There are specific areas in furniture where plywood edge banding is not applied. Cabinet backs and drawer bottoms, for example, do not receive edge banding because they are already embedded in dado grooves, providing sufficient sealing. Internal plywood drawer parts are also not edge banded as it does not add any significant value. However, it is important to note that some manufacturers may neglect edge banding on the bottom and back edges of plywood cabinets, which can lead to moisture damage and compromise the durability of the furniture.
> Read more: laminate flooring, hardwood flooring, baltic birch plywood, maple plywood, ACX plywood, BBOES plywood
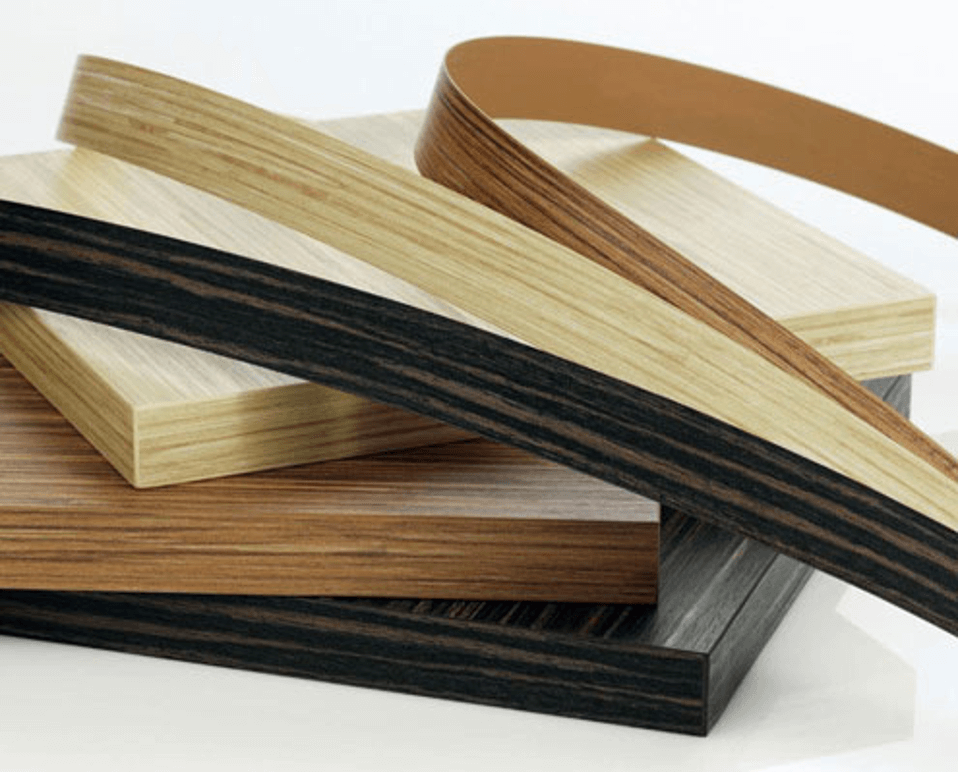
How to choose types of edge banding for plywood?
Edge banding is a crucial element for finishing plywood projects, offering both aesthetic appeal and functionality. Here's a guide to selecting the right type of plywood edge banding:
Matching wood species:
- Cohesive look: Achieve a seamless finish by choosing edge banding that matches the wood species of your plywood. For instance, use birch edge banding for birch plywood and red oak edge banding for red oak plywood.
Size considerations:
- Slightly wider is ideal: Opt for edge banding slightly wider than the thickness of your plywood. This creates a small overhang that can be sanded smooth for a professional finish.
- Avoid excessive overhang: While a slight overhang allows for sanding, excessive overhang translates to unnecessary sanding and wasted material. A good rule of thumb is to avoid edge banding more than 1/16" wider than your plywood.
Color options:
- Natural wood tones: For a natural aesthetic, match the wood species of your edge banding to your plywood.
- Painting projects: If you plan to paint your project, consider using versatile black or white edge banding.
> Discover more: burnt plywood floor, plywood edge banding, plywood garage walls, plywood kitchen cabinets
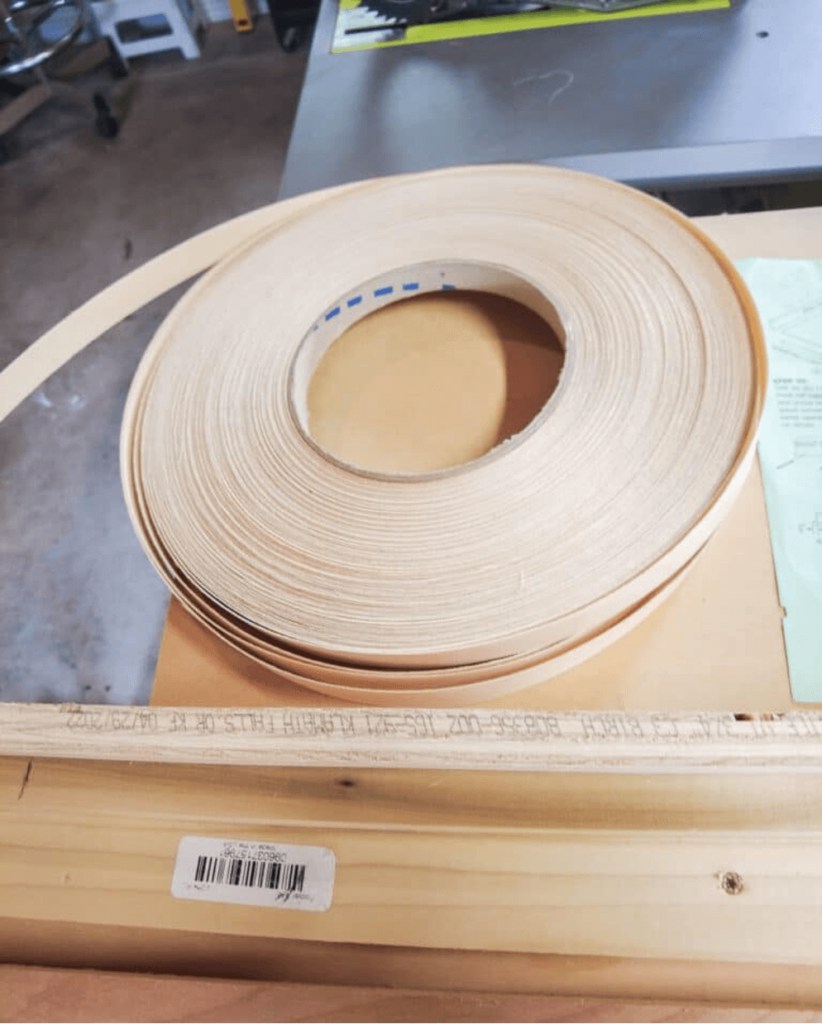
How to apply plywood edge banding without fancy equipment
Iron-on edge banding offers a simple and effective way to finish plywood edges. Here's a step-by-step guide:
Materials:
- Iron (preferably not your best one)
- Iron-on edge banding (choose a width slightly wider than your plywood thickness)
- Utility knife (optional)
- Scrap wood block
- Sandpaper (220 grit recommended)
- Orbital sander (optional)
Instructions:
- Prepare the Plywood: Ensure the edges you plan to cover are clean and free of dust or debris.
- Measure and Cut Edge Banding: Unroll the edge banding and measure a length slightly exceeding the plywood edge. You can cut it with a utility knife if needed.
- Line Up and Apply Heat: Align the edge banding with the plywood edge, ensuring it overhangs slightly. Set your iron to the "cotton" setting (no steam) and carefully iron the edge banding.
- Observe Glue Melting: Watch closely as the heat melts the adhesive between the edge banding and plywood.
- Press and Move: Once the glue melts, move the iron down the edge while simultaneously pressing firmly with your fingers (be cautious, it will be hot!) or a scrap wood block. This ensures a secure bond.
- Work in Sections: Apply the technique in manageable sections (6-12 inches) at a time. Melt the glue, press the edge down, and then move on to the next section.
- Repositioning and Trimming: If the edge banding needs repositioning or doesn't adhere well, simply reapply heat and adjust as needed. To trim the excess at the end of the plywood edge, fold the banding over the edge (twice) and break it off. Alternatively, use a utility knife for a cleaner cut.
- Apply to Corners: When applying edge banding to corners, allow one side to slightly overlap the other. This will be sanded smooth later.
- Sanding: Once the edge banding is applied and cooled, use sandpaper (or an orbital sander with 220 grit sandpaper) to sand down any rough edges or glue squeeze-out. This creates a smooth and seamless finish.
- Fixing Loose Edges: If you encounter any loose edge banding while sanding, simply reheat the area with the iron and press it firmly to ensure a secure bond.
Tips:
- Dedicate an iron specifically for edge banding applications to avoid transferring glue residue to your clothes.
- Work in small sections to maintain control and ensure proper adhesion.
- Overlapping edge banding at corners allows for easier sanding to achieve a seamless finish.
By following these steps, you can effectively apply iron-on edge banding to your plywood projects, creating a clean and professional look.
> Explore further: hdo vs mdo plywood, tongue and groove plywood, walnut plywood, white oak plywood

FAQs of Plywood Edge Banding
Can I apply edge banding without special tools?
Yes! Iron-on edge banding only requires a standard iron, a sharp knife, and sandpaper. No industrial equipment needed.
Is iron-on edge banding durable?
When properly applied, iron-on edge banding offers a strong, lasting bond suitable for most residential and commercial applications.
What type of edge banding should I use for painted plywood?
Use white or black PVC edge banding for a clean, paint-ready surface that won’t show through lighter colors.
Does edge banding improve plywood moisture resistance?
Yes. Edge banding adds a seal that helps prevent water from penetrating and damaging the plywood core.
What glue is used for iron-on edge banding?
Iron-on edge banding comes pre-applied with heat-activated glue, typically EVA (ethylene-vinyl acetate), which melts under heat to form a strong adhesive bond.
Can you stain or paint edge banding?
Wood veneer edge banding can be stained or finished just like solid wood, making it ideal for projects requiring a natural look.
Plywood edge banding offers a simple yet effective solution for enhancing the appearance of plywood projects. By carefully selecting the right edge banding and following the application steps outlined in this guide, you can achieve a seamless and professional finish. For more in-depth information about plywood, visit our website at https://vinawoodltd.com/
VINAWOOD – Vietnam Plywood Supplier & Manufacturer
> Get more details: