How to build a plywood shed door: Step by step guide
Can you use plywood for a shed door? Absolutely! Plywood is a popular, cost-effective, and durable choice for shed doors, offering strength, versatility, and easy customization. In this article, we’ll explore the benefits of using plywood for shed doors, the best types to choose, and tips to ensure…

A 4-by-7-foot DIY shed door built from 5/8" exterior plywood, a 2x4 frame, and a diagonal brace runs about $80 to $130 in materials at most US lumberyards. That's roughly a quarter of what a pre-hung steel shed door costs and gives you control over the size, hinge swing, and finish — which is why plywood-framed doors remain the default for backyard shed builds and barn outbuildings. The walkthrough below covers panel choice, frame layout, and the eight-step build sequence that keeps the door square and sag-free.
Can you use plywood for a shed door?
Yes. Plywood is a standard material for shed door construction, used by DIY builders and professional joiners alike. The reasons are straightforward — it's strong on a 2x4 frame, lighter than solid timber slabs, and costs a fraction of factory doors. The catch is the grade. Interior plywood will not survive a single wet winter on a shed door. Exterior-grade, pressure-treated, or marine plywood is the only acceptable spec.
The frame matters as much as the panel. A 2x4 perimeter with a diagonal cross-brace is the structural part of the door — the plywood is the cladding. Skip the frame and the panel will sag off its hinges within a season or two. Add the brace and a quality exterior paint or sealant, and the door will hold square through years of weather.
Hinges and trim finish the job. Two heavy-duty T-hinges (three on doors over six feet) carry the load. A 1x4 trim band around the perimeter covers the plywood edge and adds another layer of weather protection. None of this is exotic carpentry — it's standard shed-door construction.

What type of wood should I use for shed doors?
Exterior-grade plywood is the workhorse choice for shed doors. It's stable, accepts paint and sealant well, and pairs cleanly with a 2x4 frame. Pressure-treated framing lumber underneath gives you the moisture protection the panel doesn't have on its own. Both should be sealed before assembly — bare end-grain on either material wicks water fast.
Other timber and panel options that work for shed doors:
- Cedar — naturally rot-resistant, holds up well unpainted, gives an attractive grey weathered finish over time. Costs more than plywood per board foot.
- Redwood — similar weather resistance to cedar, generally more expensive, and stocks vary by region.
- T1-11 plywood siding — the grooved exterior siding panel, sometimes used as door cladding for a rustic look. Stronger than thin plywood and finishes well.
- Pressure-treated lumber — best used as the door frame rather than the visible face. Resists decay and helps the door stay square against moisture cycles.
Whichever face material you pick, treat it. Sealant or two coats of exterior paint are the difference between a door that lasts a decade and one that lasts a season.
How to build a plywood shed door
1. Prepare materials & tools
Gather everything before you start cutting. Trips to the hardware store mid-build are how doors end up out of square.
Recommended materials
- Exterior-grade plywood (1/2" or 5/8" thick), cut to the door opening minus 1/4" to 1/2" clearance on all sides
- 2x4 pressure-treated lumber for the internal frame
- 1x4 or 1x2 boards for edge trim and the diagonal brace
- Exterior screws (1-1/2" to 2-1/2") for fastening
- Heavy-duty T-hinges (two for doors under six feet, three above)
- Latch, hasp, or handle for closure and security
- Exterior-grade paint, stain, or sealant
Essential tools
- Circular saw or table saw for clean straight cuts
- Drill or impact driver for screws
- Measuring tape and pencil
- Level to keep the frame square and the door plumb
- Clamps and shims for assembly and hanging
- Hammer or nail gun for trim work
- Paintbrush or roller for finish coats
2. Measure & cut panels
Measure the door opening height and width, then subtract 1/4" to 1/2" total for clearance. That gap matters — too tight and the door won't swing once humidity swells the frame; too loose and you've created a draft path. Mark and cut the plywood with a circular saw, scoring the face cut first to keep the veneer from chipping.
Cut the 2x4 frame next: top rail, bottom rail, two stiles, and any horizontal mid-rail or diagonal brace your design calls for. Lay the cut pieces dry on a flat surface and check that everything sits square before you commit screws.

3. Build 2x4 frame
Build the frame on a flat surface — a workbench, a garage floor, anywhere you can lay a level on it. Use exterior screws to join the corners and check square with a framing square or by measuring the diagonals. They should match within 1/8".
Add a horizontal mid-rail at hinge height for extra stiffness. For doors over five feet wide, add a diagonal brace running from the top hinge corner down to the bottom latch corner. The brace works in compression — that orientation is what stops the door from sagging.
4. Assemble back panel
Lay the plywood face-down on a clean surface and set the frame on top. Align the frame edges with the panel edges, check square one more time, then drive exterior screws through the panel into the frame at roughly 12" centres. Use shorter screws on the perimeter and longer ones into the brace.
Done right, the back panel is now the structural sandwich that keeps the door rigid through years of opening, closing, and weather cycles.
5. Attach front panel
Some shed door builds use a single panel with the frame visible on the back. Others use a "sandwich" build with plywood on both faces of the frame. The sandwich version is heavier and uses more material, but it's significantly stronger and weather-tighter.
If you go sandwich, flip the assembly over and lay the second plywood panel on top. Align edges flush (or with a small intentional overhang for trim cover), then screw down at 10" to 12" centres into the frame.
6. Install exterior trim
Trim does two jobs. It hides the plywood edges, which is the first thing weather attacks, and it reinforces the perimeter. Run 1x4 boards around all four sides, mitred or butt-jointed at the corners, and fasten through the plywood into the 2x4 frame underneath.
Seal the back of the trim before you fit it. Once it's on, you can't get to it again without dismantling the door.
7. Add final bracing (Optional but recommended)
If you didn't build a diagonal brace into the frame, add one now to the back face. A 1x4 running from the top hinge-side corner to the bottom latch-side corner does the job. Screw it through into the perimeter frame at both ends and at any mid-rail it crosses.
This single board is the difference between a door that hangs straight for ten years and one that drops out of plumb in eighteen months. Don't skip it on doors over four feet wide.
8. Hang the door
Lift the finished door into the opening and shim it for even gaps — about 1/4" to 1/2" on the top and sides, slightly more at the bottom for sweep clearance. Mark hinge positions, attach the hinges to the door first, then to the jamb. Three-hinge doors get the middle hinge centred between the other two.
Open and close the door several times before you fit the latch. If it binds anywhere, plane or sand the offending edge. Once it swings clean, install the latch hardware and apply a final coat of sealant or paint to any cut edges or screw heads exposed during hanging.
Is OSB or plywood better for shed doors?
Plywood, comfortably. OSB swells more than plywood when wet, holds onto moisture longer, and tends to delaminate at the edges over a few wet-dry cycles. Exterior-grade OSB performs better than the standard board, but it still doesn't match plywood for door applications.
The cost saving on OSB is small once you factor in the shorter service life. For a shed door that sees rain on every surface every winter, exterior plywood with proper sealing is the right call. Reserve OSB for sheathing inside the wall assembly, where the building envelope keeps it dry.

Should you waterproof the inside of a shed?
Yes — at least in damp climates. Even a watertight roof and walls don't stop condensation from forming inside as temperatures swing day to night. Over a few seasons that condensation is enough to grow mould and start rot in floor and stud framing.
Three steps cover most of the risk:
- Apply a waterproof sealant or interior paint to the floor and the lower wall sections most exposed to splash-back.
- Run weatherstripping around the door frame and any opening windows to slow draughts and keep wind-driven rain out.
- Install a passive vent or two — high in one wall, low in the opposite wall — so air moves through the space and condensation doesn't pool.
Done together, those three jobs keep tools, fasteners, and stored timber dry for the life of the shed.
A plywood shed door isn't a complicated build. The materials list is short, the cuts are mostly straight, and the only step that needs precision is squaring the frame. Get the frame right, brace it, seal both faces, and the door will hold up to anything the seasons throw at it.
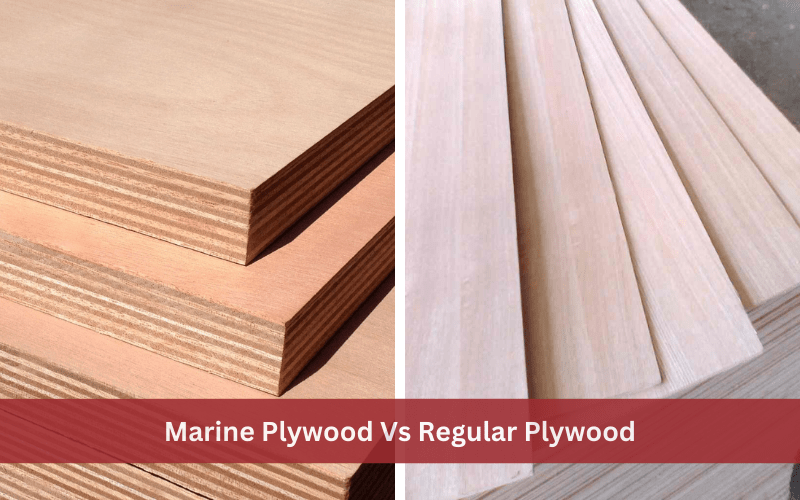
For sheds in particularly wet or coastal climates, step up to marine-grade plywood and stainless screws. Everywhere else, exterior-grade plywood with two coats of paint is enough. The build is the same either way.
VINAWOOD – Vietnam Plywood Supplier Manufacturer